How To Get Windows 11 On Your Old Laptop or PC?
In this article, you will read about How To Get Windows 11 On Your Old Laptop or PC. So, let’s get started.
Microsoft’s latest desktop operating system is Windows 11, which offers an easy upgrade for Windows 10 users. Simply navigate to the Settings menu and download it like any other update.
But, if your device is not supported by Windows 11, this means that your system is lacking some requirements.
Microsoft has introduced several new hardware requirements such as a CPU with a TPM 2.0 security chip, support for Secure Boot, and a minimum of 4GB of RAM and 64GB of storage.
If you’re reading this article, chances are you’re one of the unlucky users whose device doesn’t meet these requirements. But here’s the good news: there is still a way for you to install Windows 11 on your old laptop and run it smoothly, despite the lack of official support from Microsoft. It’s important to note that this method comes with risks, and you should proceed at your discretion. Additionally, there’s no immediate urgency since Windows 10 will continue to receive updates until October 2025.
If you have decided to transition to Windows 11, here’s what you need to do.
First, Download And Install Windows 11

Installing Windows 11 on your old laptop or PC that doesn’t meet the hardware requirements requires making modifications to the Registry. It’s important to note that these changes can be permanent, so it is advisable to back up your device before proceeding. Carefully follow the steps outlined in this article.
While this article focuses on installing Windows 11 on the device where it is downloaded, it is also possible to transfer it to another device.
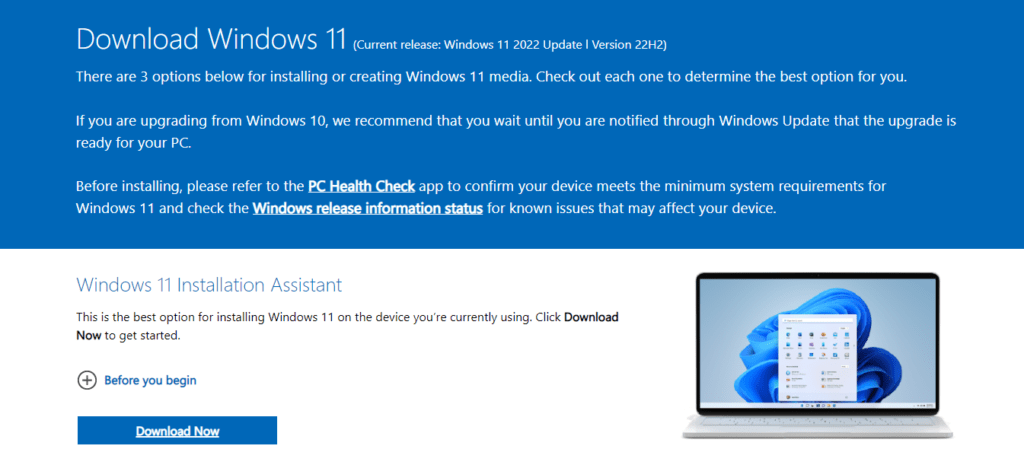
To begin the installation process of Windows 11 on your old laptop, visit the official Windows 11 download page. On the page, click on the ‘Download Now’ button located under the ‘Windows 11 Installation Assistant’. If you intend to install it on a different device, select either the ‘Installation Media’ or ‘ISO’ options instead.
After downloading the file, open it and carefully follow the provided instructions to initiate the installation. If your device does not meet the necessary hardware requirements, you will receive a message indicating that “This PC can’t run Windows 11.”
Visit The Relevant Registry Editor page

To open the Registry Editor, type ‘registry’ in the search bar located next to the Start menu. Select the relevant option that appears and click on it. When prompted, click ‘Yes’ to confirm that you allow changes to be made.
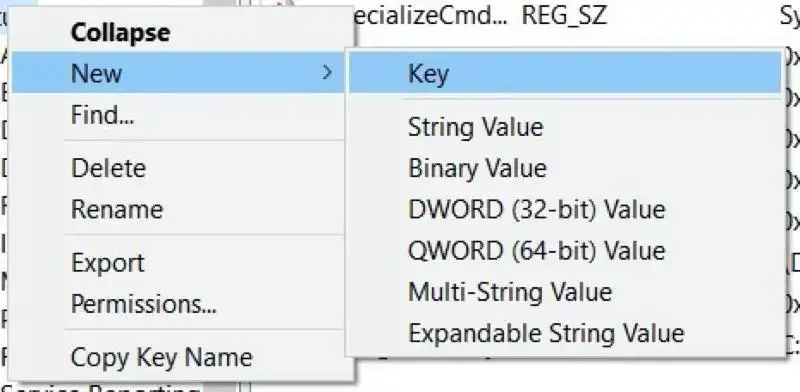
Next, in the address bar of the window that opens, type ‘Computer\HKEY_LOCAL_MACHINE\SOFTWARE\Microsoft\Windows\CurrentVersion\Setup’ and press Enter. Once you’re in the designated location, right-click on any space and select ‘New’ followed by ‘Key’.
Now, Create the ‘BypassTPMCheck’ value

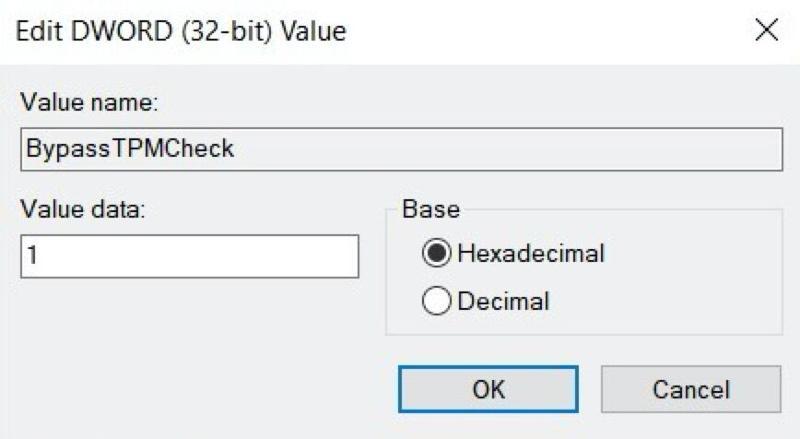
Create a new key by entering ‘LabConfig’ as its name. Once the key is created, right-click on it and select ‘New’ followed by ‘DWORD (32-bit) Value’.
Assign the name ‘BypassTPMCheck’ to the newly created value. Right-click on it and choose ‘1’ as the Value data. Confirm the changes by clicking ‘OK’.
If your device does not support Secure Boot or has less than 4GB of RAM, repeat this step for each requirement. Simply modify the names to ‘BypassSecureBootCheck’ and ‘BypassRAMCheck’ accordingly.
Repeat for the protection of RAM and Boot (if it is important)

If your device lacks support for Secure Boot or has less than 4GB of RAM, you need to repeat step 3 for each requirement. The only changes you need to make are the value names, which should be set as ‘BypassSecureBootCheck’ and ‘BypassRAMCheck’ respectively.
Once you have completed these steps, close the Registry Editor and the Command Prompt window (type ‘exit’ and press Enter). From the ‘This PC can’t run Windows 11’ screen, click the back button, and you should be able to continue the installation process as usual.
It is important to note that following these steps may potentially impact the performance or stability of Windows 11. Proceed with caution and be aware of any potential consequences.
Is it considered safe to install Windows 11 on a device that is not officially supported?
Windows 11’s hardware requirements primarily revolve around security, despite some considering them overly strict. Operating a system without a TPM chip or Secure Boot, which are integral to Windows 11’s design, poses a risk. However, if your device meets most of the requirements, you might still be able to use it without encountering major issues.
The risk increases as the hardware gets older. Ideally, it is advisable to install Windows 11 on a laptop or PC that is not your primary device. If this is unavoidable, make sure to thoroughly back up your device to prevent any data loss.
Recommended For You:
Windows 10 Features Absent in Windows 11
How to use the same WhatsApp account on two phones?
Article source: Tech Advisor


